Beginner's Guide to Using RecorderX on Windows
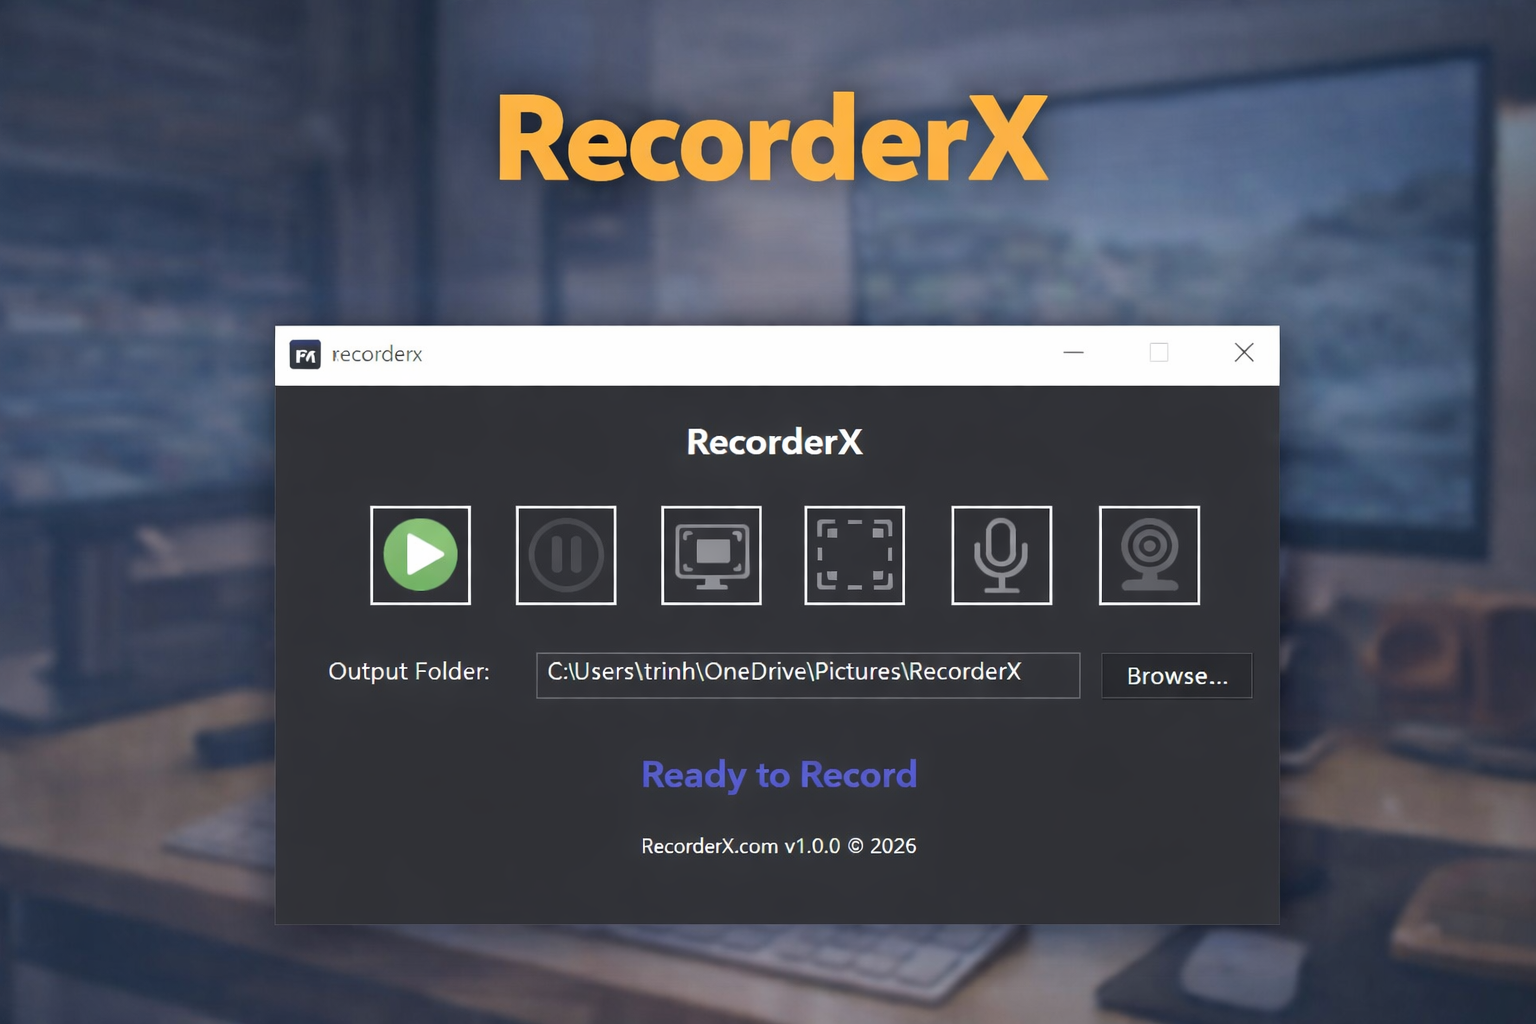
RecorderX is a powerful and easy-to-use screen recording tool. This guide will help you get started quickly.
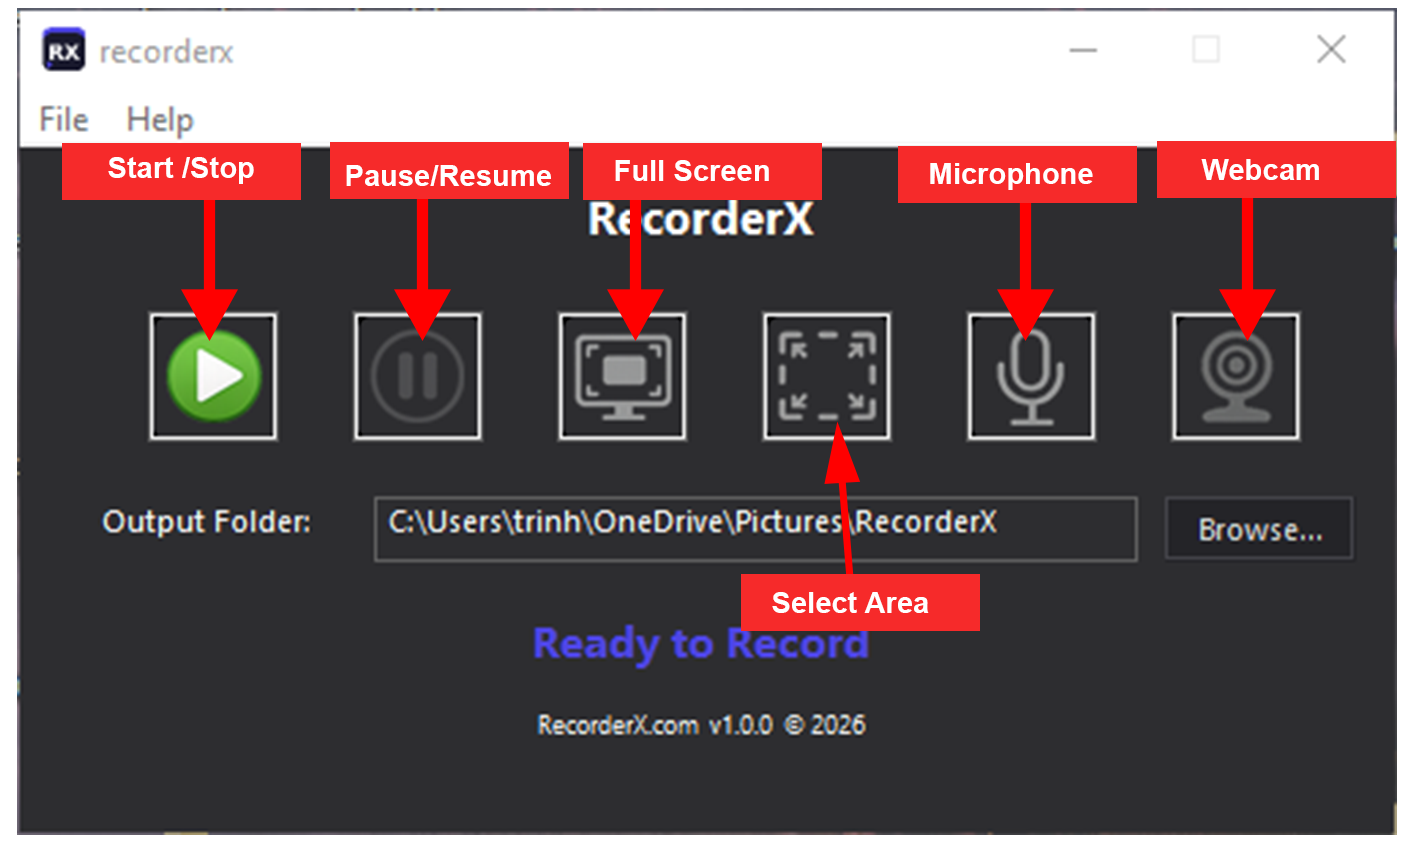
1. Start / Stop
- Start: Begins recording your screen instantly.
- Stop: Ends the recording and saves your video file.
Use this when you want to start or completely finish a recording session.
2. Pause / Resume
- Pause: Temporarily stops recording without ending it.
- Resume: Continues recording from where you paused.
Helpful when you want to skip unnecessary parts without creating multiple files.
3. Full Screen
Records your entire screen.
Best for presentations, tutorials, or when you want to capture everything displayed on your monitor.
4. Select Area
Allows you to choose a specific area of the screen to record.
Useful when you only want to capture a particular window or section, keeping the video focused and clean.
5. Microphone
Turns your microphone on or off.
- When enabled, your voice will be recorded.
- When disabled, only system audio (if selected) will be recorded.
Ideal for voiceovers, explanations, or commentary.
6. Webcam
Enables or disables your webcam overlay.
- When enabled, your camera will appear as a small window on the screen.
- You can position it in different corners (top/bottom, left/right).
Perfect for personal presentations, tutorials, or reaction-style videos.
General Settings
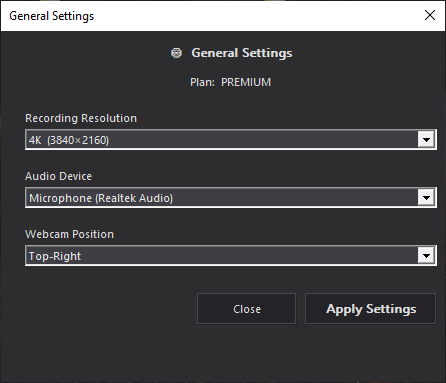
1. Recording Resolution
Choose the video quality for your recordings.
- 1080p (Full HD): Balanced quality and file size, recommended for most users.
- 2K: Higher clarity than 1080p, suitable for more detailed recordings.
- 4K (Ultra HD): quality with very sharp details, but larger file size and higher system requirements.
2. Audio Device
Select the audio source for recording.
- System Audio: Records sound directly from your computer (e.g., videos, music, game audio).
- Microphone: Records your voice using a connected mic.
- You can choose the appropriate device depending on whether you want internal sound, voice, or both.
3. Webcam Position
Set where your webcam overlay appears on the screen.
- Top Left
- Top Right
- Bottom Left
- Bottom Right
Choose a position that does not block important content in your recording.
Related Posts
Top 11 Best Screen Recording Software for PC in 2026
Apr 18, 2026